ASSEMBLING WEDDING INVITATIONS: A STEP-BY-STEP GUIDE
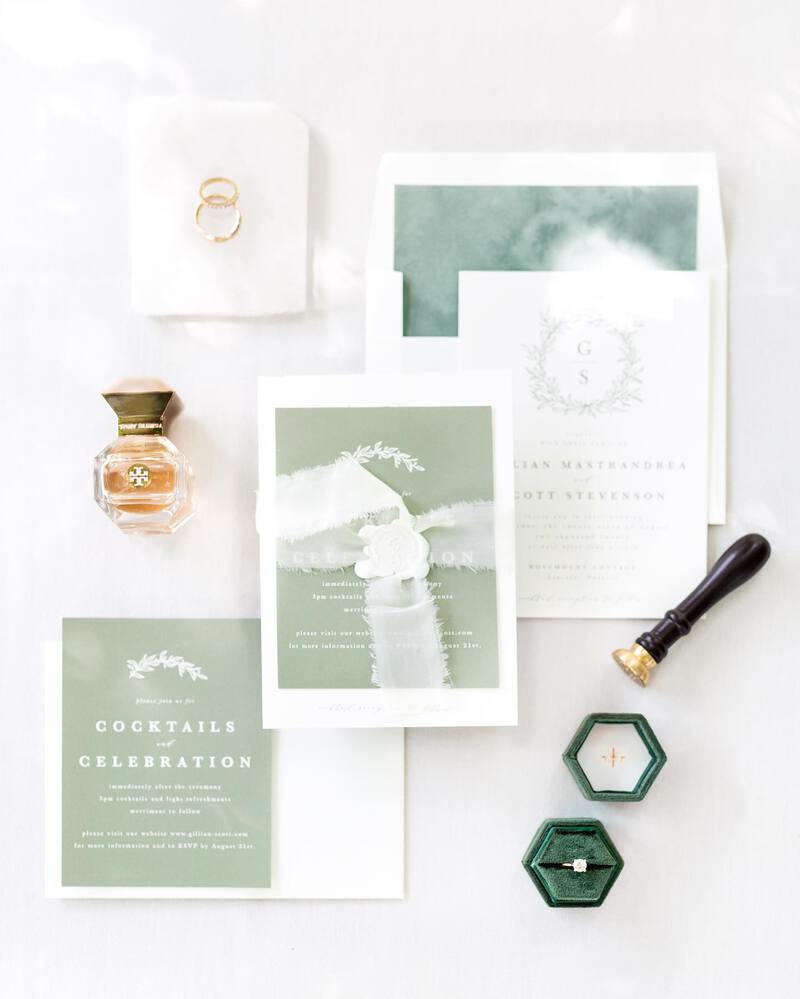
Photo by Livi Shaw
“RomanticWedding” Invitations by Minted
Each element in the wedding invitation suite, from the intricate event details to the finishing touches, comes together to create a stunning introduction to your special day. Due to the amount of information, an invitation suite usually consists of multiple cards in different sizes. Etiquette and customs are also part of considerations.
In this guide, we'll walk you through the art of assembling wedding invitations, ensuring that every envelope carries not just information, but the essence of your celebration.
Step 1: Get the main invitation card
For the most part, wedding invitations are assembled in size order, with each card placed face up and the largest card on the bottom. Start with the invitation card on the bottom, print side up.
Step 2: Add vellum liners
If a thin sheet of vellum comes in between each invite, it’s your choice whether to include it or not (traditionally, this was used to prevent the ink from smearing or rubbing off during the mailing process). If you’d like to include it, place the sheet of vellum on top of the invitation card.
Step 3: Stack the reception card
Next, if you are using a reception card, place it face up on top of the wedding invite.
Step 4: Stack other enclosure cards
Place the remaining enclosure cards—i.e., direction or detail card, map card, or hotel accommodations card—face up on top of the reception card.
Pro Tip: If the main wedding invitation is a folded card, place enclosures within the folded invitation (not on top).
Step 5: Add a RSVP card and envelope to the suite
If you have chosen a traditional, mailed back RSVP card, place the envelope for your RSVP—printed side-down—on top of the enclosure cards, with the envelope flap on the left; this envelope should be pre-printed with the mailing address. Then, insert the reply card (another term for your RSVP card) under the envelope flap, face up so the printed side is visible. Don’t forget to pre-stamp the reply envelope; this will save your guests from having to dig around for postage.
Step 6: Time for the Finishing Touch
If you have chosen to add a belly band, a ribbon, or a vellum wrap to perfectly complete your suite, you’ll want to assemble this now. See our FAQ section below for our tips on recommended ribbon lengths, ways to tie your ribbon, and how to fasten your belly band.


Step 7: Recipient addressing
While more formal invitation suites may include inner envelopes (printed with guests’ names) and outer envelopes (printed with guests’ names and address), Minted has seen a shift toward sustainability and simplicity through the use of just a single outer envelope. For this reason, only outer envelopes are included with all of our invitations.
Traditionally, calligraphy was used to address envelopes; if you’re hiring a calligrapher, be sure to get your envelopes to him or her at least two to three weeks before you need them. For an efficient and polished look, you could skip the calligraphy and save time by printing the names and addresses directly on the envelopes. Remember, when you print your invitation suite with Minted, guest addressing and custom envelopes are free!
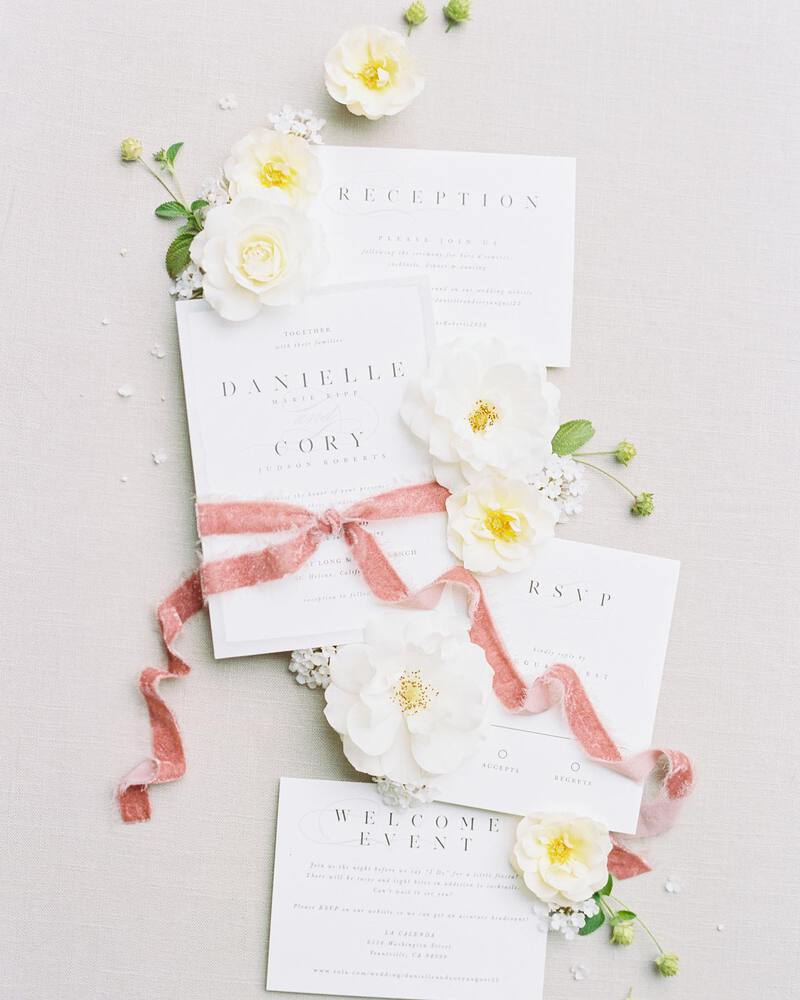
Photo by Jen Rodriguez
Step 8: Insert the whole suite to the envelope
If you purchase slip-in envelope liners with your invitations, be sure to slide these into your envelopes prior to inserting your suite. To do so, peel off the strip of adhesive on the back of each liner and slide it into place, pressing firmly to ensure it is secure.
Insert the fully assembled invitation suite into the envelope (left edge first for a single-card invitation; folded edge first for a folded invitation). The rationale is, when the flap is opened, guests should be able to read the invite as they take it out with their right hand without having to turn the card.


Shop Envelopes and Envelopes Liners
Step 9: Seal the envelope
Use a bottled envelope moistener to wet the gummed edge of your outer envelopes; be careful not to use too much—you don’t want soggy, puckered envelopes. After you’ve sealed all the envelopes, place a heavy book or two on top of the stack to ensure all of them are securely sealed. Add the wax seal after securing your envelope if you opt for one.


Step 10: Return Address
Make sure your envelopes have address labels. If you opt for a SkinnyWrap™ or a rubber stamp address label, this is when you would like to apply it on each envelope.


Step 11: Mail and done!
Before you mail your wedding invitations, bring a fully assembled set to the post office and ask them to weigh it so you know exactly how much postage you’ll need (be sure to also ask about international postage rates, if applicable). Once all your envelopes are stamped with sufficient postage, bring them to the post office to be hand-canceled (instead of dropping them in a mailbox). Hand-canceling alerts the post office to manually sort the envelopes instead of running them through machines; this will reduce the risk of your invites being damaged in the mail.
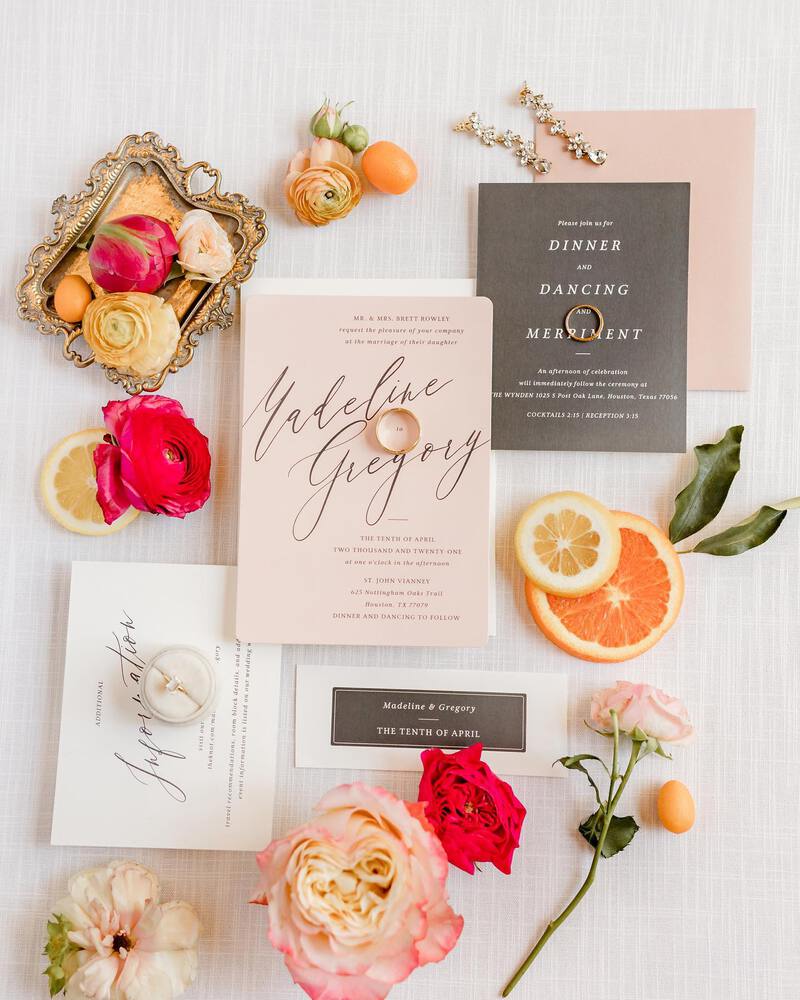
Photo by Amy Maddox
“Scripted Names” Invitations by Minted


Now that your invitations are mailed, you can start your final preparations for your big day! Don’t forget to select designs for your programs, place cards, table numbers and other day-of essentials to create a cohesive wedding day style. If you need help with choosing your day-of stationery, get a free consultation with Minted's stationery expert to get personalized recommendations and assistance with customizing all of your stationery needs!
WEDDING INVITATION ASSEMBLY: FAQs
Will my wedding stationery arrive assembled?
No. Wedding invitations and all enclosure cards will be shipped to you flat in stacks and require assembly; belly bands and envelope liners also require assembly. If you order ribbons to add to your invitation suite, it will be shipped as a ribbon bundle and will need to be cut to your desired length. Vellum wraps, jackets, and pockets may also need to be folded and scored to fit around your suite.
How do you assemble wedding invitations without an inner envelope?
The same stacking order described above still applies if you are not using an inner envelope. Your assembled invitation stack should be in the following order:
- Invitation
- Reception card
- Direction card / Accommodations card
- RSVP card with RSVP card envelope
Do you seal the inner envelope of a wedding invitation?
No. Traditionally, the inner envelope is left unsealed before being placed in the outer envelope, with the guest’s name facing out.
How do you use a belly band?
Minted’s belly bands are narrow (2") strips of paper that are designed to wrap around your wedding suite; included are clear stickers to securely seal them in place. They are designed to match your wedding invites as a perfect finishing touch to your invitation suite. The belly bands can be personalized with your names, wedding date, or a meaningful message of your choosing.
To assemble your wedding invitation suite with a belly band, here’s what you’ll need to do:
- Stack your invitation suite in the order described above, with your invitation on the bottom and all cards facing up. Your stack should be in the following order:
- Invitation
- Reception card
- Direction card / Accommodations card
- Reply card with reply card envelope
- Center the belly band over your stacked suite and place the included clear sticker on one end.
- On a flat surface, flip your suite and band over (so everything is face down). Fold the non-stickered end around the suite first.
- Wrap the stickered end of the band tightly around the suite and adhere to the other end.
- Slide your completed invitation suite into the envelope with the cards facing up.
How do you assemble wedding invitations with ribbon?
- Use a piece of string and wrap it around your fully assembled wedding invitation stack. Tie it however you’d like—a wraparound band, knot, or bow—and then cut the ends; measure that length of string and use it as a template so you know how much ribbon you’ll need to cut for each invite.
- When cutting the ribbon to your desired length, we recommend using fabric shears for a crisp, clean cut and to prevent fraying. Cut the ribbon ends at a sharp angle or dovetail both ends for an elegant, polished look.
- For portrait-oriented wedding invitations, we recommend using the following ribbon lengths:
- Ribbon band: 13 inches
- Simple ribbon knot: 22 inches
- Ribbon bow: 30 inches
- For landscape-oriented wedding invitations, we recommend using the following ribbon lengths:
- Ribbon band: 16 inches
- Simple ribbon knot: 31 inches
- Ribbon bow: 39 inches
- If you’re doing a wraparound ribbon band, we suggest using double-sided tape instead of glue, which lays flat and is less messy.
- Adding ribbon to your wedding invites will require additional postage. We suggest wrapping/tying the ribbon around your wedding invites in your desired style, then bringing a fully assembled set to the post office; ask them to weigh it so you know exactly how much postage you’ll need. We also recommend bringing all of your completed invites to the post office to be hand-canceled (instead of dropping them in a mailbox) to ensure they will be handled carefully.
What is the proper way to put an invitation in an envelope?
Your invitation suite should be inserted, fully assembled, into the envelope with the left edge first for a single-card invitation or folded edge first for a folded invitation. Ensure that the text is print-side up, so when the flap is opened, guests can immediately see the text.
Do envelope liners require assembly?
If you ordered foil-lined envelopes, these come pre-assembled and do not require any additional steps. Minted’s customizable slip-in envelope liners, however, come separately with a peel-and-seal adhesive strip for quick and easy assembly. They measure 6.5 x 5.25" in size and cover the interior of the envelope flap and drop 3/4 of the way into the envelope (note that the liners will not reach the bottom of the envelope).
Minted’s envelope liners can be purchased as a matching accessory to wedding invitations; they are packaged separately from the invitation envelopes, have a pre-applied adhesive strip, and can be easily slipped into the envelope for quick assembly. To assemble the envelope liners, here’s what you need to do:
- Remove the top layer of the pre-applied adhesive strip.
- Carefully slide the liner into the envelope using the sides of the flap to center the liner.
- Once lined up, firmly press the liner to adhere it to the envelope.
- Using the crease on the envelope flap as your guide, close the envelope and press the fold.
Or, you can purchase Minted’s pre-lined invitation envelopes, which means no assembly is required. Each of your envelopes will arrive with a liner already in place.
How do I assemble my All-in-One wedding invitations?
Minted’s all-in-one wedding invitations allow you to share wedding details and an RSVP, no separate reply card needed. Here’s how to assemble your all-in-one invitations:
- Start with your invitation lying face up, with the addressed side down.
- Fold up the bottom RSVP panel along the pre-scored crease.
- Fold down the top flap.
- The folded invite should now resemble an envelope, with the top flap covering the bottom.
- Seal the invitation closed with the clear stickers provided. We suggest using multiple stickers for a secure seal and to ensure proper USPS handling: Place the stickers in the center as well as on both sides of the invite.
How much postage will I need to mail my wedding invitations?
Minted’s wedding invitations, without any additional enclosure cards (like reply cards, direction cards, accommodations cards), weigh less than one ounce. However, the best way to confirm the postage required for your mailing is to take a fully assembled invitation suite, including all enclosures and embellishments (like belly bands or ribbon), to your local post office so they can weigh it and tell you the exact postage it will require.
Does Minted send wedding invitation samples?
Yes, we would love to send you sample wedding invitations! This way, you can see our papers and printing techniques for yourself to help you visualize your wedding stationery. We offer three different sample options (all free!):
- Free sample kit with our curated designs: This includes a handpicked mix of flat, foil-pressed, and die-cut invitations, plus swatches of our premium paper.
- Free sample kit with your design selections: You pick your favorite wedding invitation designs, which we will add to our free sample kit and mail directly to you. To choose this option, browse our wedding invitation designs; select a favorite design and select "order a sample." Use code: 10FREE for a $10 samples credit.
- Free sample kit with a personalized save the date: Choose from five of our unique save the date designs, personalize it with your photo and specific wedding details, and we will send it to you with our free sample kit.
Will Minted mail my wedding invitations for me?
Minted does not offer mailing services at this time. All of our wedding stationery will be shipped to you flat, ready for assembly. But don’t stress: Assembling wedding invitations is very quick and easy, especially if you have an extra set of hands (or two!). Our best advice: Host an invitation assembly party. Enlist a couple of pals or family members and show them how to stuff your wedding invitations. Get a couple of bottles of wine and some snacks, and then create a wedding invitation assembly line according to our directions outlined above. Assign everyone a task and be the one to do a final check before the wedding invitation suites are inserted in the mailing envelopes. You’ll be done and ready to drop them off at the post office in no time.